Archive | Activities & Projects RSS feed for this section

How to Remove Vinyl Lettering

14 Aug

Last week, one of our clients brought over a van for us to letter. Vinyl lettering is a long-lasting, weather proof decoration tool that works well on vehicles, windows, and walls.  The van was not new and had old vinyl lettering that need to be removed. The best way to do this involves a heat gun, a squeegee, paper towels, and Rapid Remover (an all-natural, citric acid mixture).

Start by pulling off the old lettering; heat will make this task much easier.  We use a heat gun in short bursts to warm old vinyl, which allows it to stretch. You can do this without heat, but it will take longer. You can use a small, razor-sized squeegee like the yellow one pictured below, or rely on fingernails.

IMG_1985-crop

Using a heat gun is the easiest way to get the old lettering to pull off.

After removing the lettering, you are likely to have glue residue left over:

IMG_1995-glue

Glue residue leftover from lettering.

It is surprisingly easy to remove the residue. Pour the rapid remover onto a paper towel and saturate the residue-covered surface.  Give the liquid a few minutes to soften the residue. Then use a plastic squeegee to scrape off the residue.

IMG_1998-inaction

It’s better to use a normal size squeegee rather than the miniature one pictured. The glue residue will easily move around. I tend to push it into piles, scoop them onto the squeegee, and wipe off the squeegee with a paper towel.

Use paper towels and another dousing with the Rapid Remover to clean the surface. Once the surface is clean, you can add new lettering. Here is the same section of the van with new vinyl lettering.

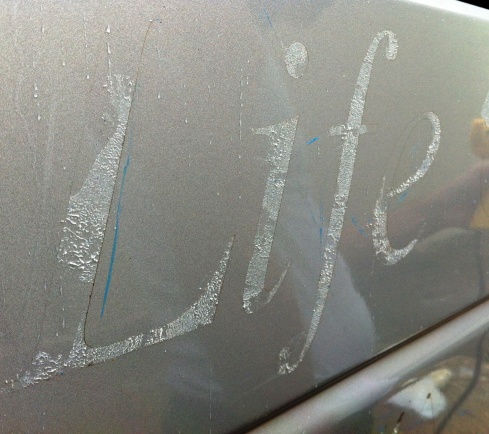
IMG_1999-new

The finished project.

Glitter Ink Rules

23 May

Rules for Printing with Glitter Ink

Here are my three rules for designing and printing glitter ink. In addition to silver and gold ink, jewel tones are available and we can do glitter vinyl.

1. Keep it Simple

You are already going to have glitter, so don’t go overboard with an elaborate design. This is a thick ink so you want to avoid layering it.

2. Avoid Designs with Fine Details

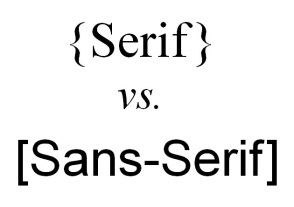
sans serif

Glitter ink has reflective flecks in it and is overall a thicker ink. Because the ink is thicker, you need to use a wider mesh screen when printing the design. Fine detail just won’t work well with glitter ink. Stick with Sans-Serif fonts, which often have “Sans” or “ Gothic” in the name, because they have plain strokes of even width.

3. Limit the Glitz

Stick with one color of glitter or glitter as accents to a solid primary design color. This is more of a personal preference recommendation than a hard-and-fast rule. In high school, I had a shirt printed in silver and gold glitter ink. You can see it here. It’s just unnecessary and it limits your design options.

Christina River Watershed Cleanup

22 Apr

ba1b39fd-effe-45b2-95e9-4584e71ead85wallpaperA few weeks ago, the 22nd Annual Christina River Watershed Cleanup took place at 12 sites throughout New Castle County. We had the privilege of making the t-shirts, designed by a local high school student, for the project. Our customer said the event went really well with 856 volunteers collecting 10-12 tons of trash, tires, and recyclables in just four hours!  For more info about this annual event, check out http://www.christinarivercleanup.org/